

Google Tag Manager để làm gì? Cách cài đặt Google Tag Manager
Google Tag Manager là một trong những công cụ quan trọng khi triển khai các chiến dịch Digital Marketing. Vậy Google Tag Manager để làm gì? Cách cài đặt thế nào? Cùng GT Digital theo dõi bài viết ngay sau đây nhé.
Google Tag Manager là gì?
Google Tag Manager (GTM) là một công cụ giúp ta cập nhật mã theo dõi và các đoạn mã liên quan (gọi chung là “thẻ”) trên trang web hoặc ứng dụng bạn một cách nhanh chóng và dễ dàng. Nó cho phép bạn thêm, chỉnh sửa và xóa thẻ mà không cần phải sửa đổi mã trang web.
Google Tag Manager để làm gì?

Cụ thể, công dụng của Google Tag Manager sẽ bao gồm các hạng mục cơ bản như:
- Quản lý Thẻ: Google Tag Manager cho phép bạn quản lý tất cả các thẻ của trang web từ một nơi duy nhất. Bạn có thể thêm, sửa đổi hoặc xóa các thẻ một cách dễ dàng mà không cần can thiệp vào mã nguồn của trang web.
- Triển Khai Tracking và Analytics: Bằng cách sử dụng Google Tag Manager, bạn có thể triển khai các công cụ theo dõi và phân tích như Google Analytics, Facebook Pixel, và các công cụ khác một cách linh hoạt và hiệu quả. Điều này giúp bạn thu thập thông tin về hành vi của người dùng trên trang web của mình.
- Quản Lý Quảng Cáo: Google Tag Manager cung cấp các công cụ quản lý quảng cáo cho phép bạn triển khai và quản lý các thẻ quảng cáo của Google Ads, Google AdWords Conversion Tracking, và nhiều hơn nữa.
- ……
Cách tạo tài khoản Google Tag Manager
Bước 1: Truy cập vào Google Tag Manager bằng đường link: https://tagmanager.google.com
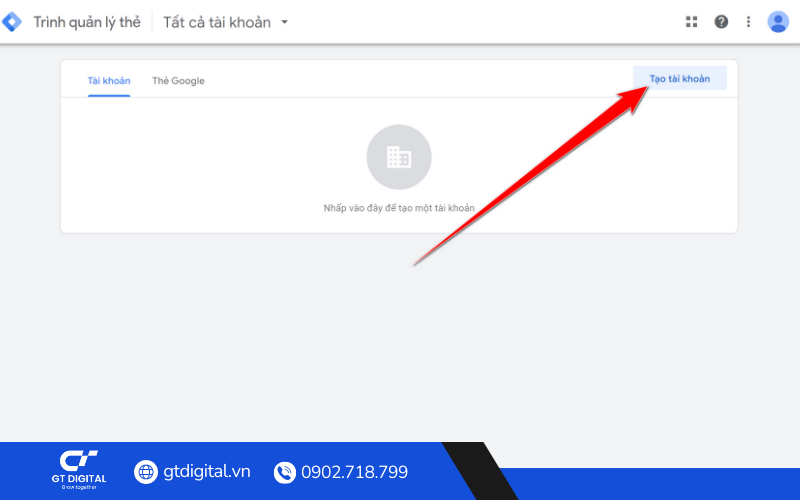
Bước 2: Góc phải ở trên, chọn “Tạo tài khoản”.
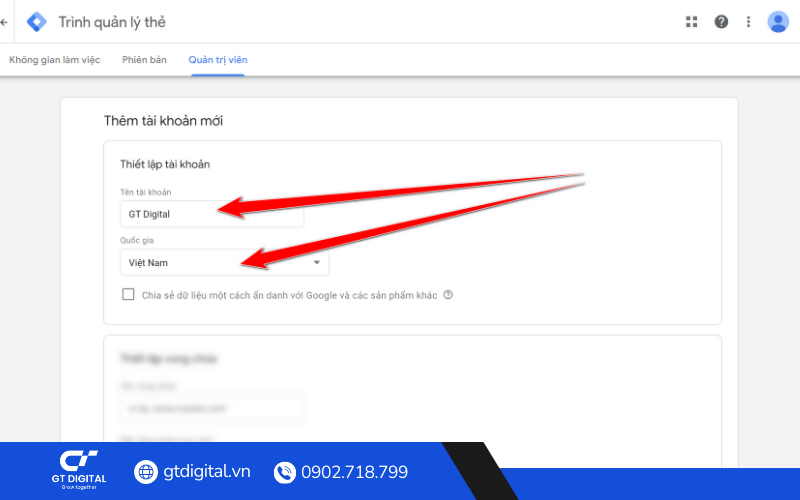
Bước 3: Tại mục “Thiết lập tài khoản”. Hãy đặt tên cho tài khoản và chọn quốc gia phù hợp.
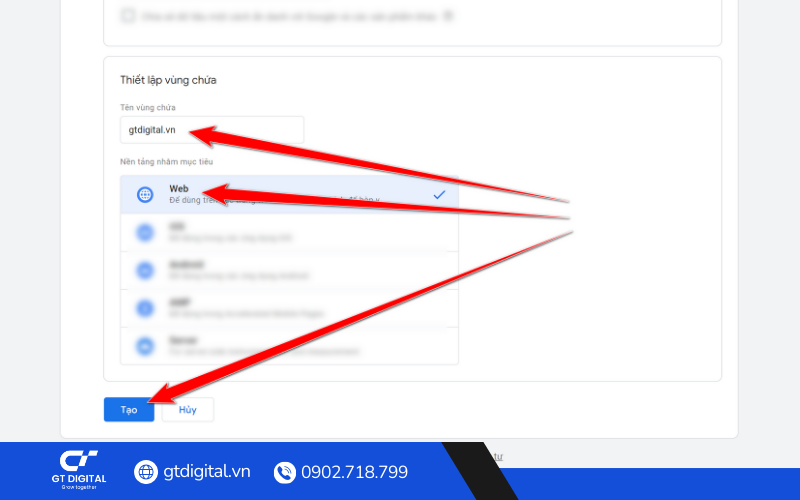
Bước 4: Tại mục “Thiết lập vùng chứa”. Hãy nhập tên vùng chứa và chọn “Web”.
Sau đó bấm “Tạo”.
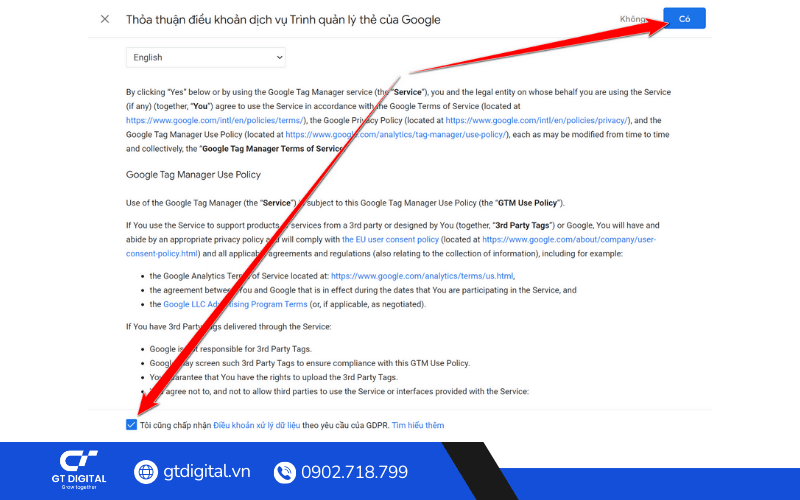
Bước 5: Tích vào ô “Tôi chấp nhận…..”. Sau đó bấm “Có”.
Như vậy bạn đã tạo xong tài khoản Google Tag Manager – Trình quản lý thẻ của Google.
Và để sử dụng được, sau đây hãy cùng theo dõi cách cài đặt Google Tag Manager vào website nhé.
Cách cài đặt Google Tag Manager vào website
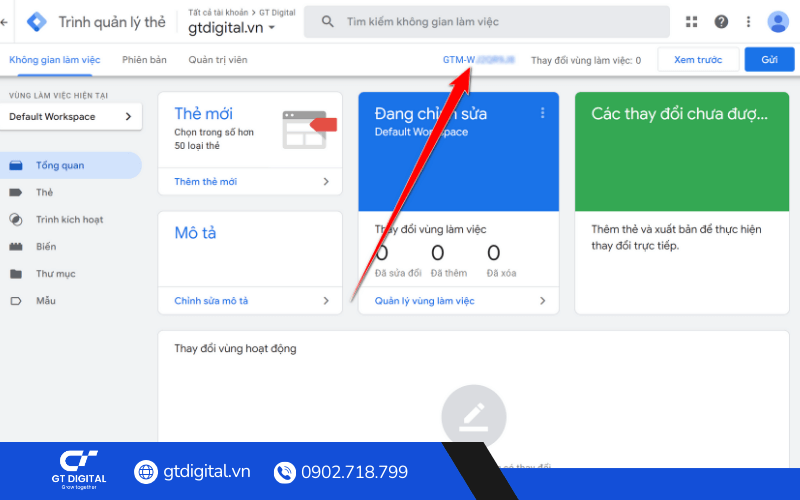
Bước 1: Tại giao diện của Google Tag Manager, bạn hãy bấm vào ID của tài khoản.
Sau khi bấm vào, cửa sổ “Cài đặt Trình quản lý thẻ của Google” sẽ xuất hiện.
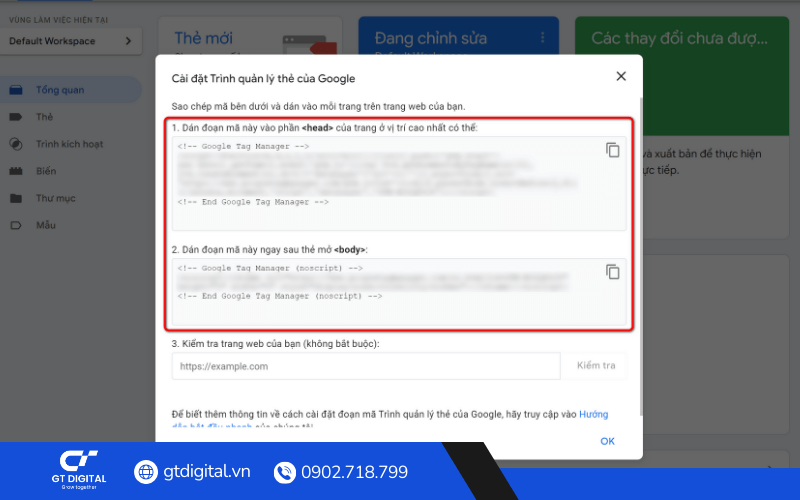
Bước 2: Copy 2 đoạn mã và gửi cho quản trị viên web để gắn vào website của bạn
- Đoạn mã 1: Dán đoạn mã này vào phần của trang ở vị trí cao nhất có thể.
- Đoạn mã 2: Dán đoạn mã này ngay sau thẻ mở .
Vậy làm thế nào để biết là đã cài đặt Google Tag Manager thành công hay chưa? Cùng theo dõi tiếp nhé!
Cách kiểm tra cài đặt Google Tag Manager thành công hay chưa
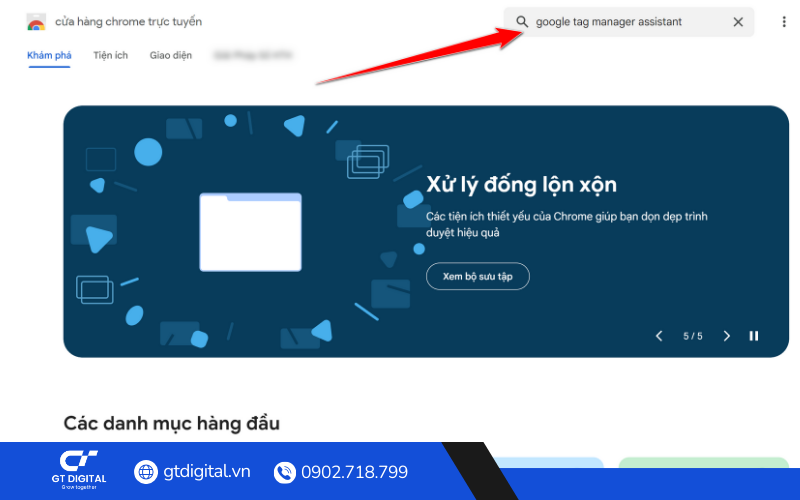
Để kiểm tra, bạn cần tải một tiện ích trên Google (Ở đây mình ví dụ với trình duyệt là Chrome).
Bước 1: Truy cập vào cửa hàng tiện ích của Google bằng đường link https://chromewebstore.google.com/category/extensions
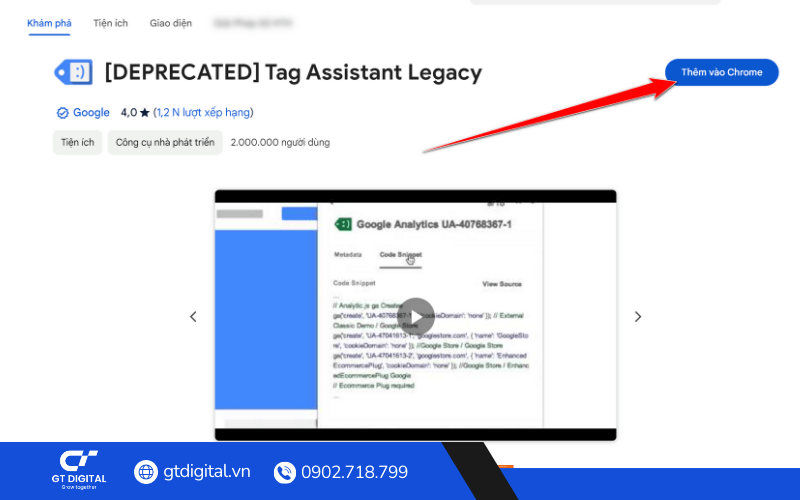
Bước 2: Tìm kiếm từ khóa “Google Tag Manager Assistant”
Bước 3: Chọn tiện ích như trên hình.
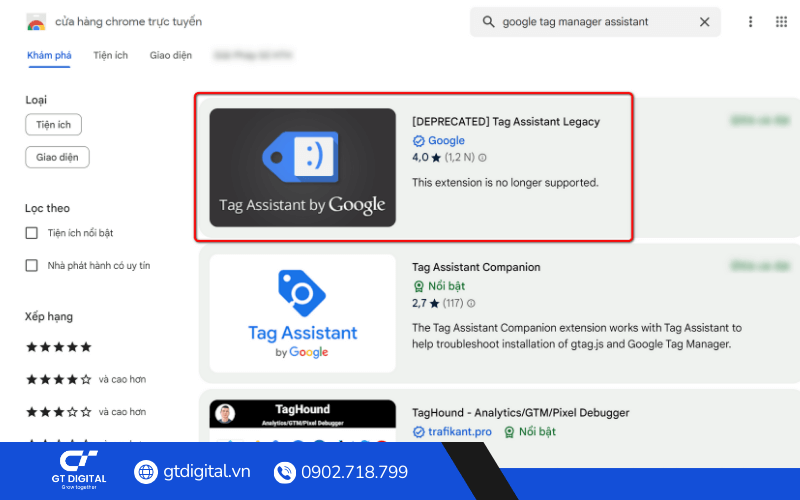
Bước 4: Bấm “Thêm vào Chrome”.
Bước 5: Sau khi cài đặt xong, bạn hãy truy cập vào trang website của mình
Bước 6: Chọn mục “Tiện ích” ở góc trên bên phải. Và chọn vào tiện ích vừa tải về.

Bước 7: Chọn “Done”.

Bước 8: Chọn “Enable”. Và load lại website.

Bước 9: Chọn lại vào lại tiện ích để kiểm tra.
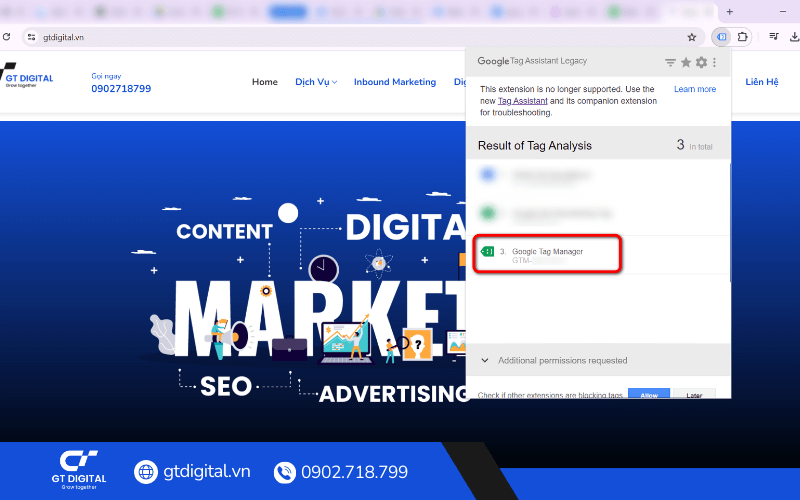
Kiểm tra xem đúng là thẻ Google Tag Manager và đúng ID hay chưa nhé. Nếu đúng thì là bạn đã cài đặt Google Tag Manager thành công.
Và trên đây là một số thông tin về Google Tag Manager. Hy vọng bài viết này mang lại những thông tin bổ ích. Hãy cùng theo dõi những bài viết khác của GT Digital để cập nhật những thông tin mới nhé.